I have been asked about the Weather Balloon Radiosonde tracker I built, so I am consolidating all the information into one location.
This is for the RDZ. Click here for the MySondeGO.
Hardware:
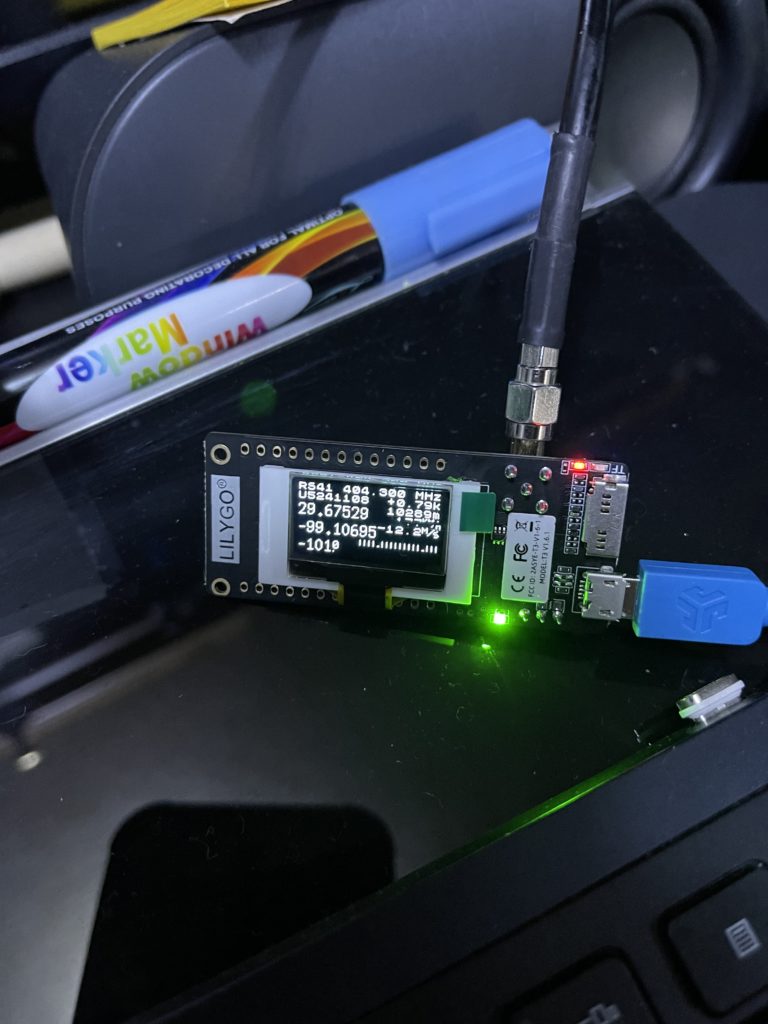
LILYGO® Paxcounter LoRa V2 the 433mHz version: https://www.aliexpress.us/item/2251832729579512.html?spm=a2g0o.order_detail.order_detail_item.4.19b6f19caG6Vsa&gatewayAdapt=glo2usa&_randl_shipto=US
Coax of choice and any needed connectors
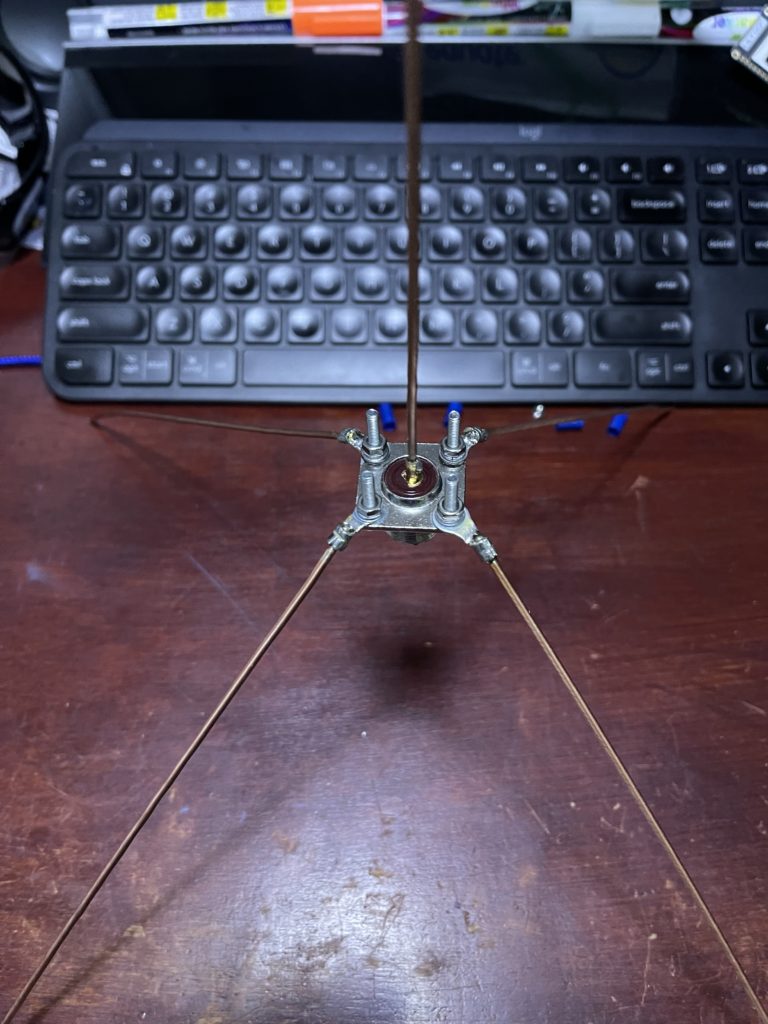
An antenna that has good receive between 400 and 410 MHz. This is an easy build and can be tuned to work directly on the frequencies needed https://m0ukd.com/calculators/quarter-wave-ground-plane-antenna-calculator/
USB power source
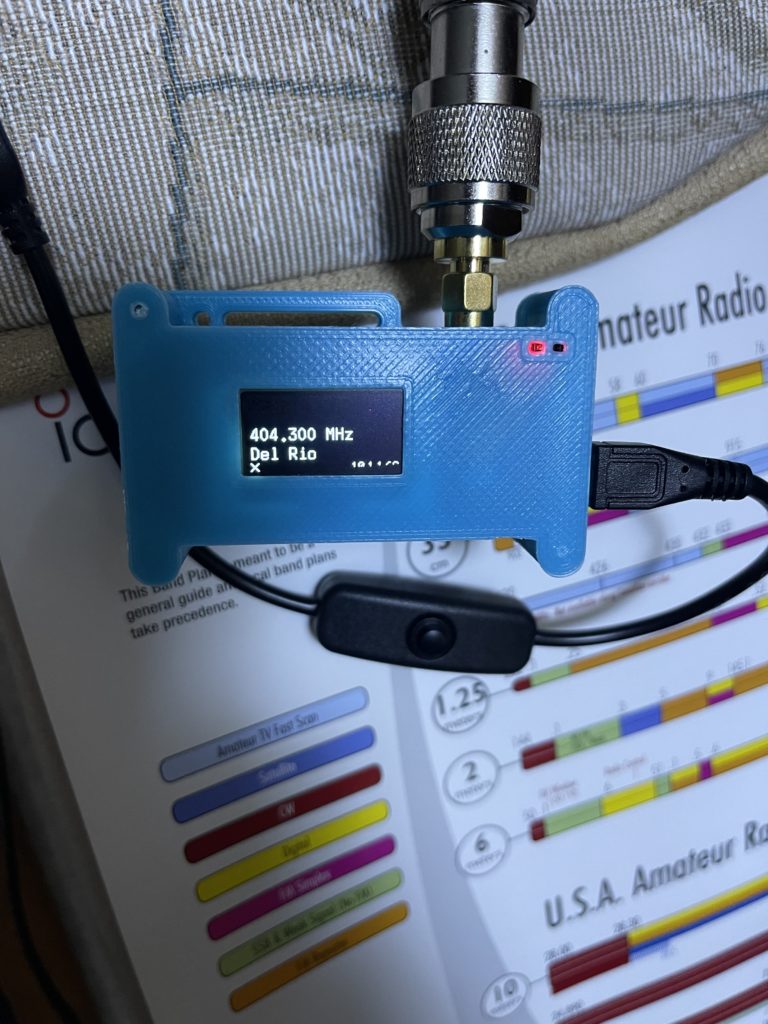
3d printed cases for the LoRa devices:
Software:
RDZ for tracking from a location with the internet: https://github.com/dl9rdz/rdz_ttgo_sonde
The RZD software is for setting up a fixed location tracker. The RDZ software can report the locations of NWS weather balloons to https://sondehub.org.
Step 1:
Download the RDZ firmware from http://rdzsonde.mooo.com/download.html. Make sure you select the latest version, which is the full.bin file.

Step 2:
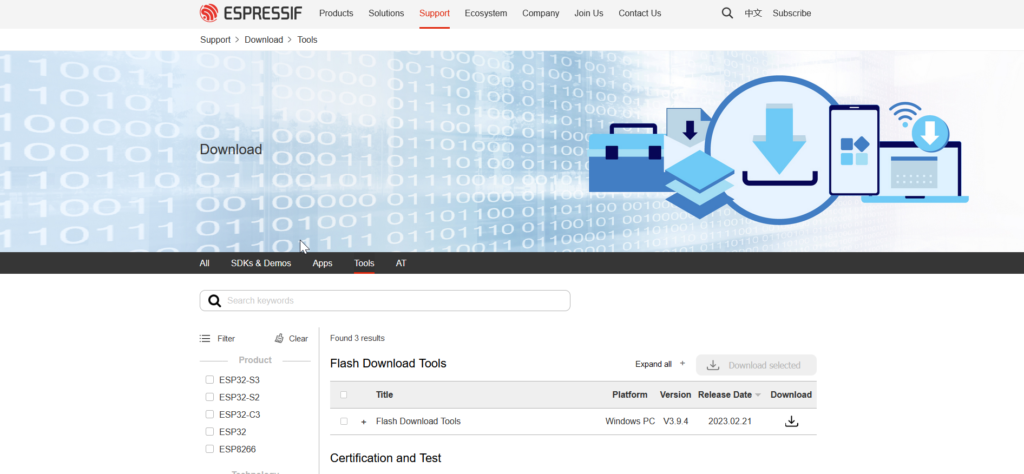
Download the ESPRESSIF flashing tool from https://www.espressif.com/en/support/download/other-tools.
Step 3:
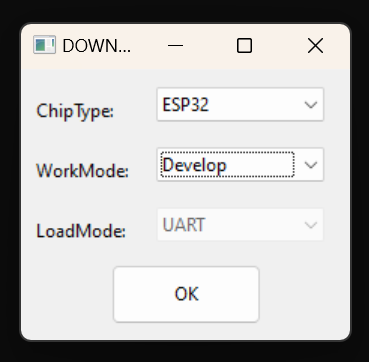
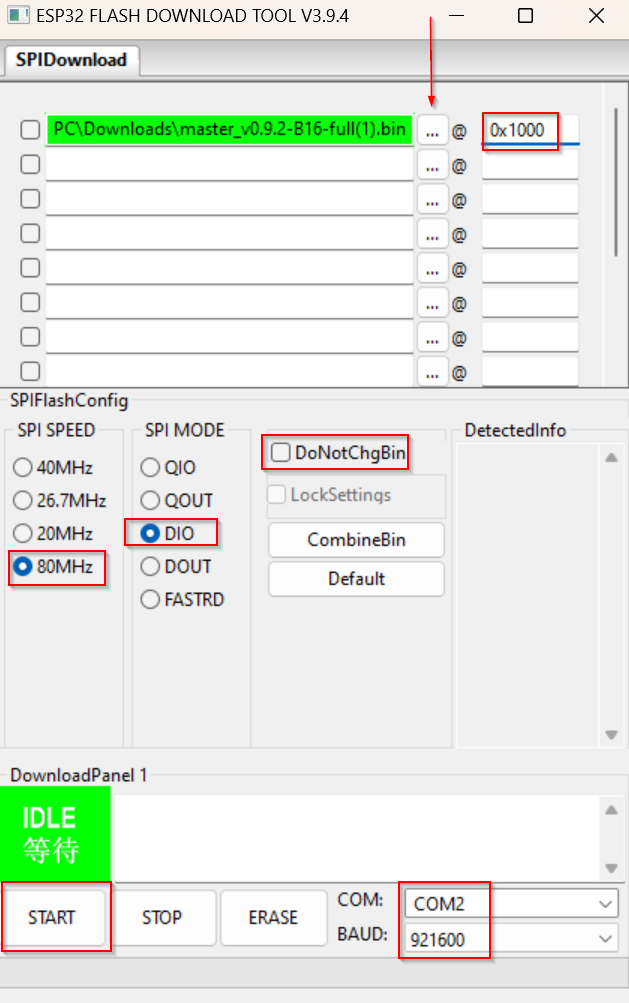
Run the ESPRESSIF flashing tool with the below configurations. To select the .bin file you downloaded in Step 1, click the three dots indicated by the arrow. Ensure all other settings match the picture and select the COM port to which the LoRA is connected. Once ready, click start. The software should load the firmware onto the LoRa. Once the firmware is loaded, restart the LoRa by unplugging the USB connection and reconnecting it.
Step 3:
After the restart, you will need to connect to the LoRa via WiFi. You will see a new network available named RDZsonde and the password is RDZsonde. After connecting to the RDZsonde network, type in the IP address listed on the front of the device. It should be 192.168.4.1.
Step 4:
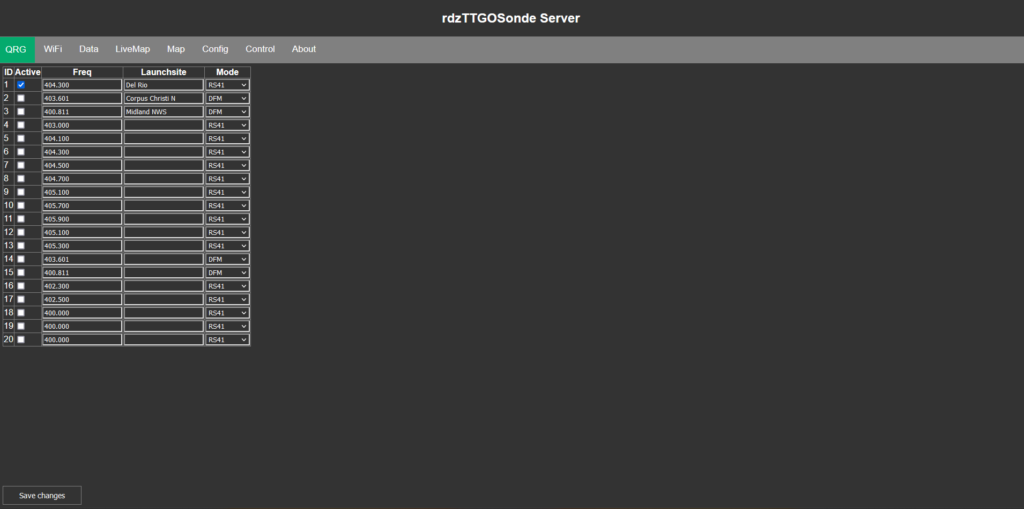
On this page, you must program the frequencies and type of Sonde you intend to listen to. You can find that information by going to https://sondehub.org and selecting the most recent launch. On the left side of the page, you will see details about that Sonde, including the frequency and the type. Enter that information into the page and click save.
Step 5:
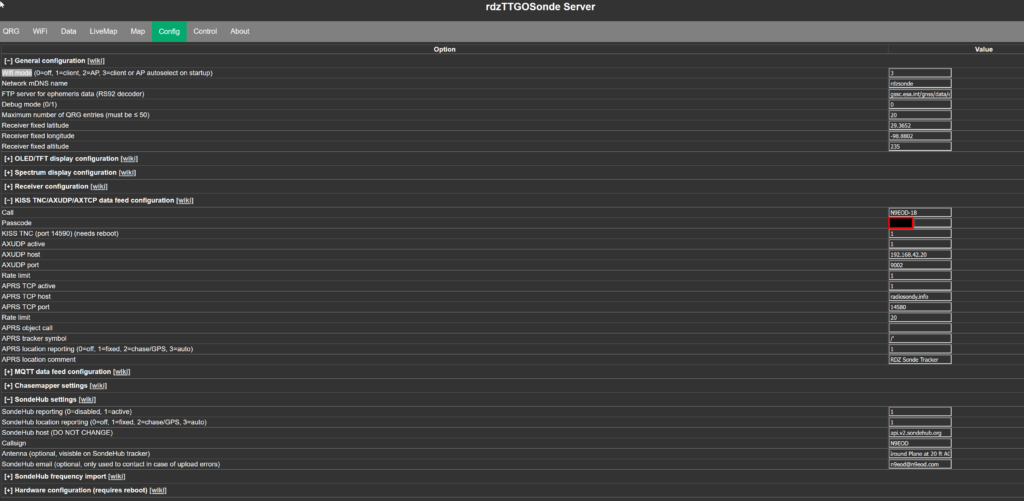
Click on the Config tab.
Under General Configuration, enter:
AP into WiFi mode
your fixed position in decimal Lat/Long into Receiver fixed latitude and Receiver fixed longitude
Your altitude in meters into Receiver’s fixed altitude
Under KISS TNC/AXUDP/AXTCP data feed configuration, enter:
Your Callsign with SSID into Call
Your APRS passcode into Passcode
1 into APRS TCP active
noam.aprs2.net into APRS TCP host
14580 into APRS TCP port
/’/( or any other APRS symbols you want but you must have 2 into APRS tracker symbol
1 into APRS Location Reporting
Any comment you wish to into APRS location comment
Under the SondeHub setting, Enter:
1 into SondeHub reporting
1 into SondeHub location reporting
Your Callsign into Callsign
Antena info if you want into Antenna
Email if you want into Email
Once all settings are entered, click save.
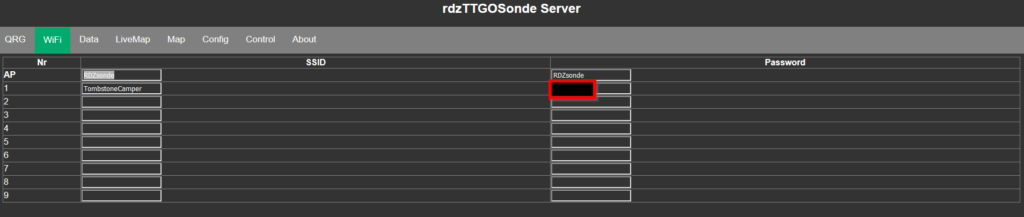
Step 6:
Click on WiFi. Remove all extra WiFi networks besides RDZsonde, then add your home WiFi network and password. Click save to save the settings. Unplug the USB and then reconnect it to restart the device. Once the device has booted, it will display its new IP address on the screen. You can use this address to connect to the RZD device and modify settings as needed.
Step 7:
Check the https://sondehub.org site for your location; within a couple of minutes, you should see a green dot appear at the coordinates you entered into the Configuration Tab.
Step 8:
NWS launched balloons at 0000 1200 UTZ every day. Depending on distance, terrain, Antenna, etc., it may take an hour for your RDZ to start hearing the Sodne signal. As your RDZ starts reporting the Sonde signal to https://sondehub.org, you will start seeing a green line between your station and the Sonde. You will also see your callsign under last received.